Yellow leaves on a houseplant: what they mean and what to do
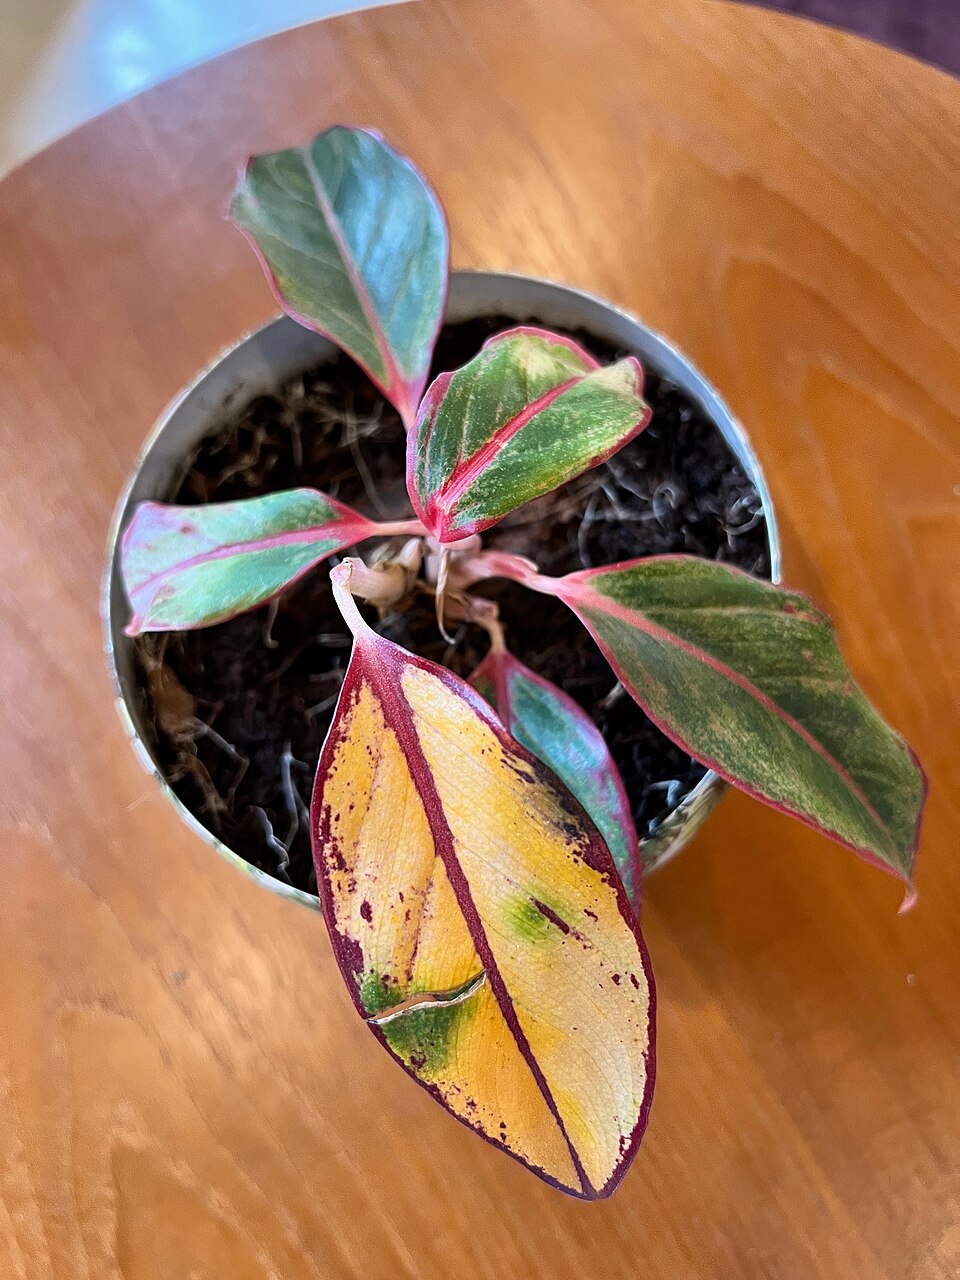
A yellow leaf is the most common thing a houseplant does to worry its owner. It is also one of the least specific. Yellow is what a leaf turns when it stops making green chlorophyll, and many different problems lead there: too much water, too little light, a hungry plant, a pest, a cold draft, or simply an old leaf reaching the end of its life.
The good news is that you can narrow it down fast by looking at where the yellow is and what else has changed. Work through the steps below in order, change one thing at a time, and be patient: a plant takes weeks, not days, to answer.
Step 1: Is it just an old leaf?
Plants shed old leaves. If one lower, older leaf turns yellow every now and then, and the rest of the plant looks healthy and keeps pushing out new growth, that is normal. The plant is pulling what it can out of the leaf and letting it go.
It is a problem when:
- many leaves yellow at once,
- the yellowing moves up the plant or starts on new leaves,
- or the plant is also drooping, dropping leaves or growing nothing.
Step 2: Look at the pattern
Where the yellow shows up is your best clue. This is a rough guide, not a diagnosis, but it points you to the right next step.
| What you see | Often points to |
|---|---|
| Lower leaves yellow, soil stays wet, soft stems | Too much water |
| Yellow leaves with crisp, brown edges, dry soil | Too little water |
| Pale, stretched growth, lower leaves drop | Too little light |
| Pale or white patches on the leaves facing the window | Too much direct sun |
| Older leaves slowly yellow all over, slow growth | A plant that needs feeding |
| Yellow between the veins of newer leaves, veins still green | A nutrient problem, often linked to roots or soil |
| Yellow speckles, sticky leaves, webbing or white fluff | Pests |
| Sudden yellowing and leaf drop after a move or a cold night | Stress from drafts or a change of place |
Step 3: Check the water first
Watering is the most common cause, and it costs nothing to check. Push a finger into the soil, as described in the watering guide.
Soil wet, leaves yellow and soft: the plant is probably getting too much water. Roots need air as well as water, and in soil that stays soaked they begin to rot and can no longer feed the leaves. Let the soil dry out more between waterings, empty the saucer, and make sure the pot has drainage holes. If the soil smells sour or the base of the stem is mushy, jump ahead to the roots step below.
Soil bone dry, leaves yellow, crisp and curling: the plant is thirsty. Water it thoroughly, until it runs out of the bottom, and check again in a few days. If the soil has dried so hard that water runs straight down the sides, try soaking the pot from below for a while.
Step 4: Think about light
Plants make their food from light. A plant that is too far from a window slowly runs out of energy, becomes pale and leggy, and starts dropping its lower leaves, which turn yellow first. Move it closer to a window, or try a plant light.
The opposite happens too. A shade-loving plant that gets hours of direct sun can bleach, with pale yellow or white patches on the leaves that face the glass, and the patches may turn brown and dry. Pull it back, or hang a thin curtain between the plant and the sun.
Move a plant gradually where you can. A big jump in light can itself cause some leaves to yellow while the plant adjusts.
Step 5: Is it hungry?
A plant that has lived in the same pot and soil for a long time can use up the nutrients in it. The signs are usually slow: smaller new leaves, slower growth, and older leaves fading to yellow.
Before you reach for fertilizer, be fair to the plant. Light and water are much more often the cause. Feeding a plant that is stressed, overwatered or rotting can make things worse. If the plant is otherwise healthy and it is the growing season, a weak dose of fertilizer is reasonable. Our fertilizing guide explains how to do it without burning the roots.
Yellow between the veins, with the veins staying green, is called interveinal chlorosis. It can point to a shortage of iron or another micronutrient, but a plant can also fail to absorb these when its roots are unhappy, for example from overwatering or an old, compacted mix. So look at the roots and the watering before you assume the plant is missing something.
Step 6: Check for pests
Turn the leaves over and look closely, including along the stems and where leaves join them. A magnifying glass or your phone's camera helps.
- Spider mites: tiny specks, fine stippling on the leaf, and sometimes thin webbing. They love warm, dry air.
- Mealybugs: small white cottony patches in leaf joints.
- Scale: small brown bumps on stems and leaves, sometimes with a sticky coating.
- Aphids and thrips: small insects on new growth, with distorted or silvery leaves.
- A sticky film on leaves or on the surface around the plant is a clue that something is feeding on it.
If you find pests, move the plant away from the others and wipe or rinse the leaves, top and bottom. Repeat every few days, because eggs hatch later. An insecticidal soap or similar product can help; follow the label on the one you choose. Check the other plants nearby.
Step 7: Temperature and drafts
Many houseplants come from warm places and do not like sudden cold. A plant on a windowsill in winter can have cold air coming off the glass at night. Radiators, heating vents and air conditioners blowing on a plant are just as bad in the other direction. Yellowing and leaf drop that starts a week or two after a move, or after a cold snap, often traces back to this. Move the plant away from the draft and give it time.
Step 8: Roots and pot
If nothing above fits, look at the roots. Slide the plant out of its pot, supporting the base.
- Healthy roots are firm and pale, often white or light tan, and smell like fresh soil.
- Rotting roots are dark, soft or mushy and can smell bad. Trim away the damaged parts with clean scissors, repot into fresh, well-draining mix in a pot with drainage, and water more carefully afterwards.
- A pot full of roots, circling and with little soil left, means the plant has outgrown it. See the guide on when and how to repot.
What to do with the yellow leaves
A leaf that has turned fully yellow will not go green again. You can pull or snip it off with clean scissors, which tidies the plant and lets it spend energy elsewhere. A leaf that is only partly yellow can stay for now, but it may not recover either.
After you fix the cause, new leaves should come in green. The old yellow ones will not change, and that is fine. Judge the plant by its new growth.
Change one thing, then wait
It is tempting to water less, move the plant, feed it and repot it all in one weekend. Then, if it improves, you will not know why, and if it gets worse, you will not know why either. Make the change that fits the clues best, give it two or three weeks, and look at the new growth. A written record of what you did and when makes this much easier.