25 corms from an Alocasia we almost killed
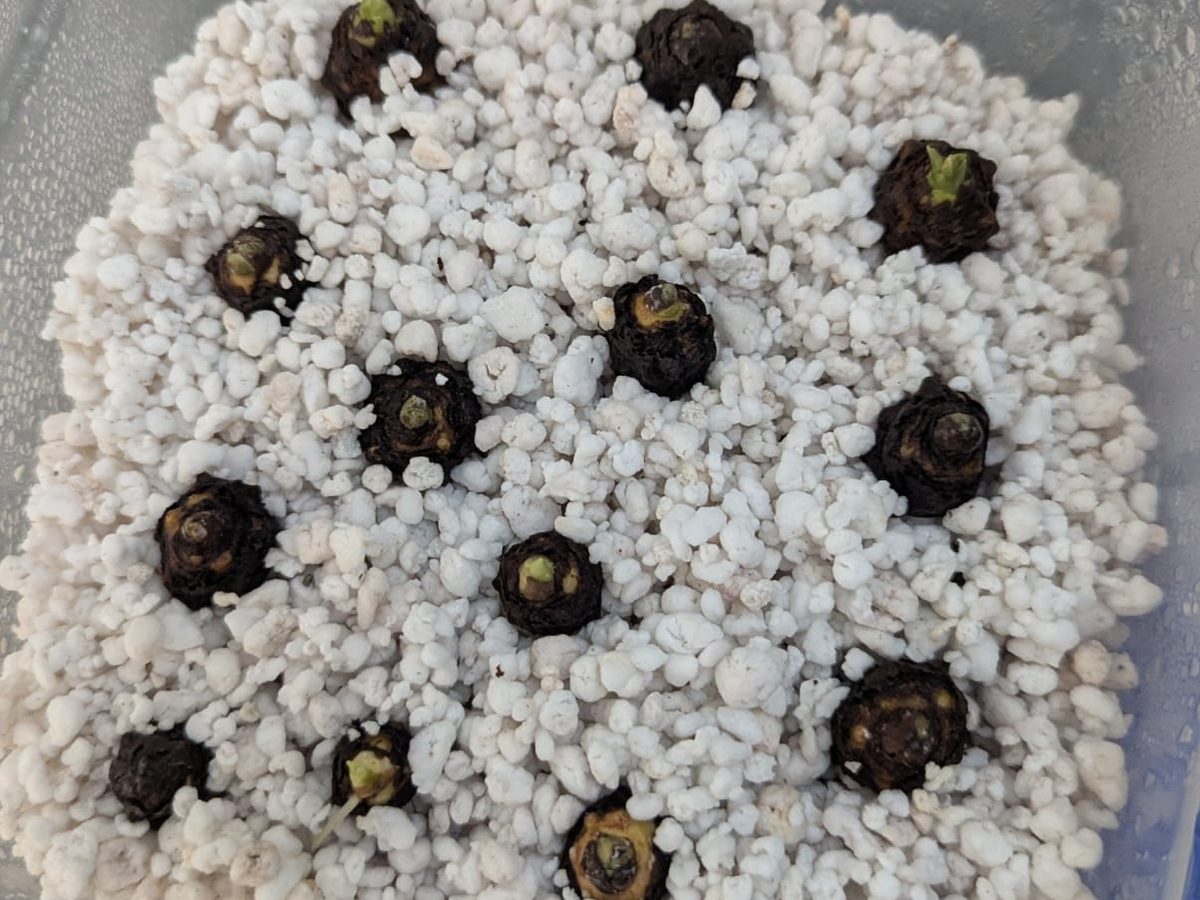
We almost killed our Alocasia cucullata. By the time we took it seriously, it was a sad plant with very little going for it, and we decided to take it out of its pot and see what was left underneath.
What was left was a surprise. Among the roots and the old mix there were small, hard, round lumps, like dark hazelnuts. We kept finding them. By the end we had counted 25.
Those lumps are corms, and each one can grow into a new plant. This post is what we did with them, what they look like as they wake up, and why we would do it the same way again.
What a corm is
Many Alocasias store energy in small corms that form along the roots, under the soil. You usually never see them, because they sit in the root ball until the next repot. A plant that is struggling, or one that has been growing for a while in the same pot, can have a surprising number of them.
A corm is a little survival kit. It has a hard brown skin, a growing point at the top and enough stored food to push out a first root and a first leaf without any help. Every corm is a genetic copy of the parent plant, so 25 corms from a cucullata are 25 cucullatas in waiting.
That is also why it is worth checking for them whenever you repot an Alocasia, and especially when a plant is in trouble. Even if the plant itself does not make it, the corms often do.
Our setup: a clear box and perlite
We did not plant the corms in soil. We put them in plain perlite, the white, light granules you normally mix into potting soil to keep it airy.
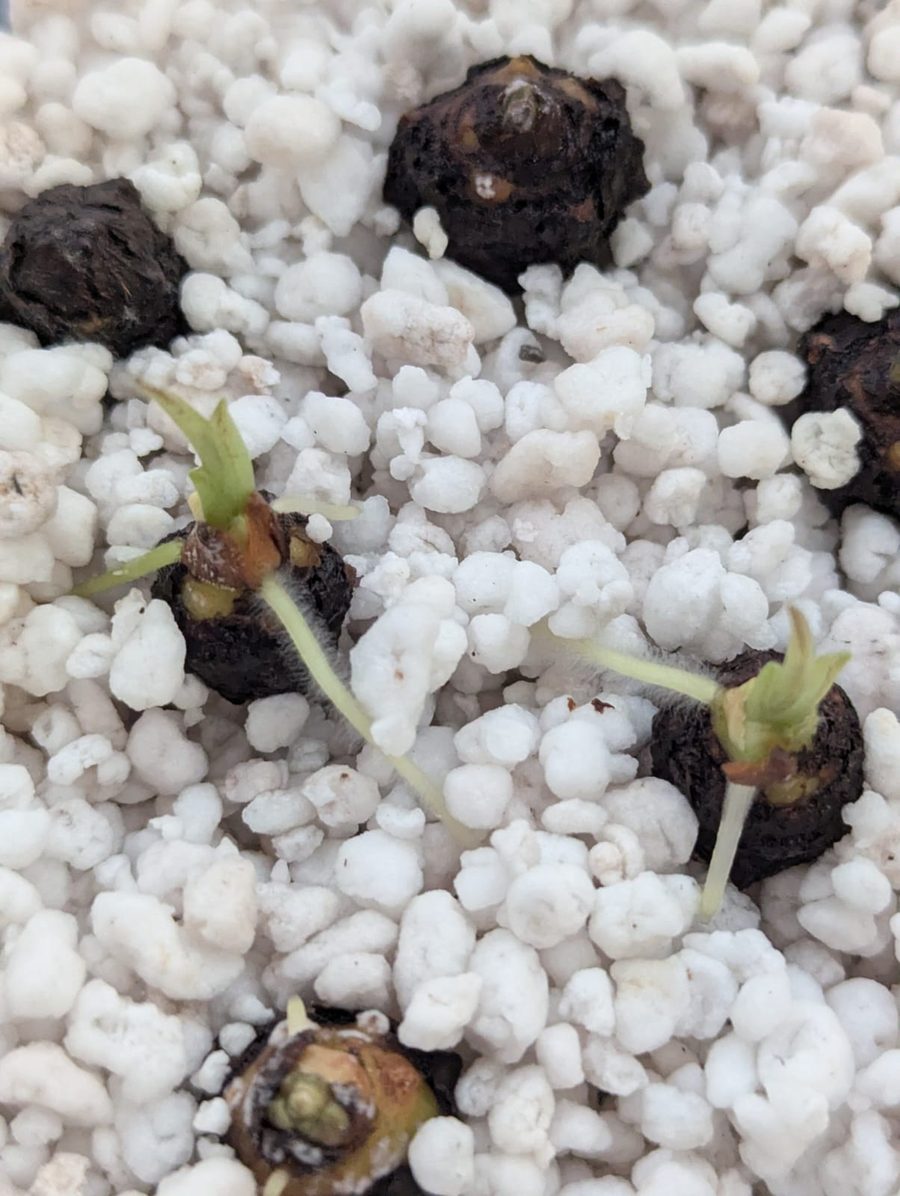
The setup is simple:
- A clear plastic box with a lid. Ours is an ordinary food container. Being clear, it lets light in and lets you see what is happening without opening it.
- A layer of perlite. Deep enough for the corms to sit half buried, with the growing point facing up.
- A little water at the bottom. Not enough to cover the perlite, just enough that the lowest layer stays wet. The perlite wicks it up, so the corms sit in damp, airy material instead of in water.
- The lid on. The air inside stays humid, and you can see drops forming on the walls of the box. That humidity is a big part of why it works.
Then you wait. Corms do not all wake up at the same speed. In the photo at the top of this post, some already show a green tip and others still look like little stones. That is normal. Give them time: in the end, most if not all of our 25 sprouted.
Why perlite worked so well for us
Perlite worked great for us, and it is easy to see why. A few reasons it suits corms:
- Nothing in it can rot. Perlite is a mineral. There is no bark or peat breaking down around the corm, which is what tends to go wrong when a corm sits in a wet, heavy mix.
- It holds water and air at the same time. The granules are full of tiny pores. They stay damp, but there is plenty of air between them, and new roots need both.
- You can see everything. White perlite makes a dark corm and a pale new root easy to spot. You never have to dig to find out whether something is happening.
What they need from you
This is the best part: almost nothing. In our experience the corms only need two things.
- Fresh air now and then. Open the lid for a while every so often, so the air inside does not go stale. That is also a good moment to look at each corm.
- The water level. Check that there is still a little water at the bottom, and top it up when it is gone. Do not flood the box.
No fertilizer, no misting, no moving them around. The corm already carries its own food for the first stage.
Watching the roots in a glass
Once a corm has a shoot and a few roots, we like to move some into a glass of perlite. A drinking glass works well, because you can watch the roots grow down along the side.
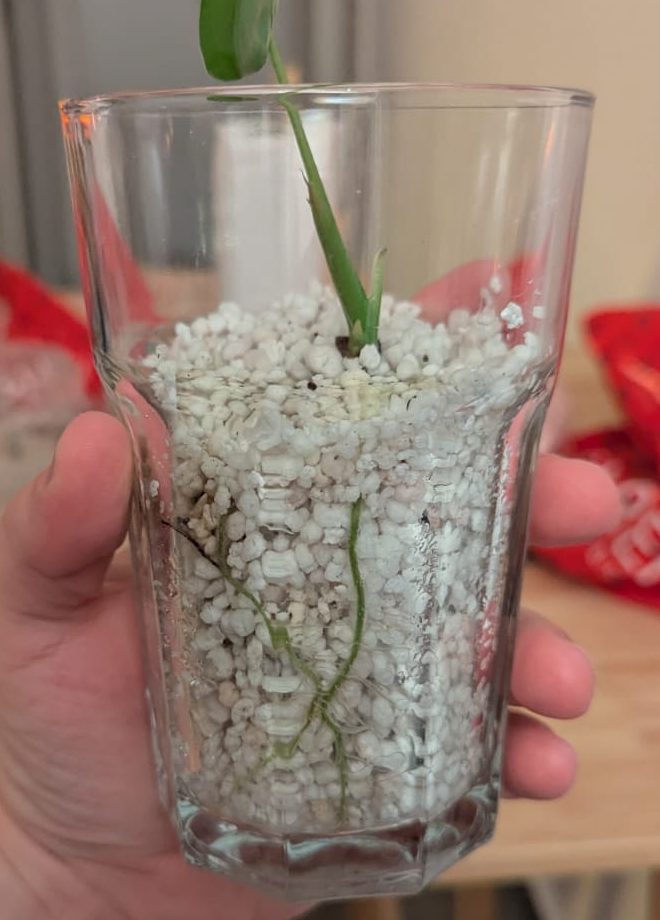
It is the same idea as the box: damp perlite, light, and not too much water. The difference is that you can check the roots at a glance, which tells you far more about how the plant is doing than the leaf does at this stage.
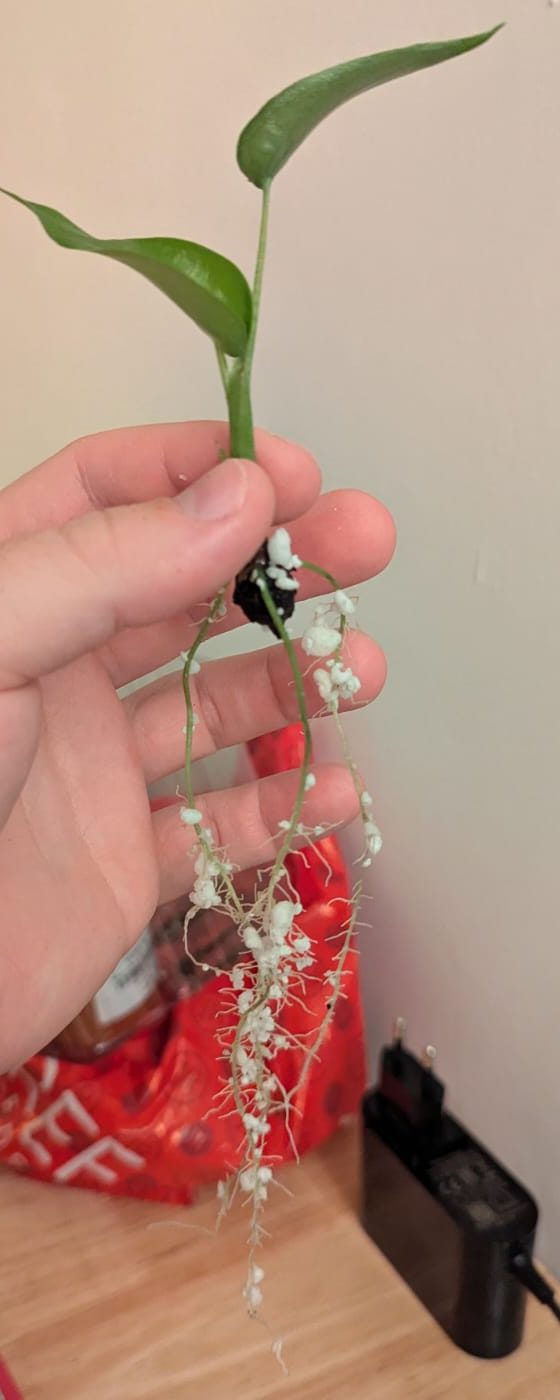
When we lifted one of the young plants out to look, the roots came up long and healthy, with perlite stuck all along them, and the little corm still visible where everything started.
When to move them on
There is no exact day, but a good sign is a young plant with a real leaf and roots that are several centimetres long. At that point it is ready for a small pot of its own. Keep the first pot small: a tiny plant in a big pot sits in wet mix for too long, which is exactly what Alocasias dislike. Our guide on repotting covers how to pick the size.
Be gentle with the roots when you move it. They are thin at this stage, and perlite clings to them. You do not need to clean every granule off; it does no harm in the new mix.
What we would tell a friend
Rescuing a struggling Alocasia taught us a few things that go well beyond corms:
- Look under the soil before you give up. A plant that looks finished above the pot can still have corms, or healthy roots, below it.
- Do not let the roots get too crowded. A root ball that is packed solid has a hard time drying out evenly and taking up water. Check it when you repot, and loosen it gently.
- A bit dry is better than too wet. With Alocasias, overwatering does far more damage than letting the mix dry a little. If you are not sure whether to water, wait a day. Our post on overwatering and underwatering shows how to tell them apart.
- Light matters more than almost anything. An Alocasia in poor light grows slowly, uses less water and stays wet for longer, which makes every other problem worse. Give it the brightest spot it can have without harsh direct sun.
We started with one plant we had nearly lost and ended up with a box full of new ones. If you have an Alocasia that is struggling, the next repot might give you the same surprise.